
Northern lights camera settings for a Tromsø night
For northern lights camera settings, start in manual mode with a wide lens, a wide aperture, an exposure of a few seconds and focus set to infinity.
Those are starting points, not rules. Every night is different: bright and fast-moving displays need shorter exposures, and faint ones need longer. The settings below are general photography knowledge, offered in good faith, and they will not match every camera. What we can add from the tour side is the context: you will be standing in the cold, in the dark, on a night the aurora may or may not perform, and our guides will help you with your camera if you ask.
On our Northern Lights Tour that help is part of the evening, so this guide is a preparation list rather than a test you have to pass.
Quick facts: Northern Lights Tour
- Ages: Ages 7+ Recommended
- Duration: 5-8 Hours
- Seasonality: Winter
- Pickup location: Outside Clarion Hotel The Edge (look for a black Mercedes)
- Time: Pick up at 19:00 (18:30 from 25 October)
- Group size: 2-8 guests (larger groups on request)
- Included: Local expert guide; Transportion in a premium Mercedes-Benz vehicle; Winter suit; A warm meal, snacks and hot drinks
- Price: from NOK 2,300 (see live prices in the booking calendar)
The starting recipe
| Setting | Starting point | Why |
|---|---|---|
| Mode | Manual | Automatic modes struggle in the dark and may refuse to take the shot |
| Lens | The widest you have | The aurora fills a large part of the sky, and a wide view includes the landscape |
| Aperture | As wide as the lens allows (a low f-number) | Lets in as much light as possible |
| Shutter speed | A few seconds, shorter when the lights move fast | Long enough to gather light, short enough to keep the shapes |
| ISO | In the low thousands, then adjust | Raise it for a faint display, lower it when things are bright |
| Focus | Manual, set to infinity | Autofocus hunts in the dark |
| File type | RAW, if your camera offers it | Gives you more room to edit colours afterwards |
| Shutter release | Two-second timer or remote | Avoids camera shake when you press the button |
If your kit lens is not especially wide or fast, do not worry. You will simply need a slightly longer exposure or a higher ISO to get the same brightness, and you accept a little more noise in return. A modest camera on a steady surface will beat an expensive one held in cold hands. Which camera you own matters far less than whether the sky cooperates, which no photographer controls.
Treat the table as a first frame. Take one, look at the screen, and adjust: too dark means a longer exposure or a higher ISO, too bright or smeared means the opposite.
Stability and focus
Exposures of several seconds need a still camera. A tripod is the usual answer. If you do not have one, rest the camera on a solid surface and use the timer so that pressing the button does not move it. Ask the team through the contact page before your tour if you want to know what is practical to bring on the night, rather than assuming equipment will be provided.
Focus in the dark. Focus is the step most people get wrong. Switch to manual focus, set the lens to infinity, then check it on a bright star or a distant light using your camera’s magnified live view. Infinity marks on some lenses are not exact, so test and correct. Once it is sharp, leave it alone, and tape the ring if you like.
Adjusting as the lights change
- Fast, bright and dancing: shorten the exposure so the curtains keep their shape, and lower the ISO if the picture is washing out.
- Slow and faint: keep the exposure longer and raise the ISO, accepting a little more noise.
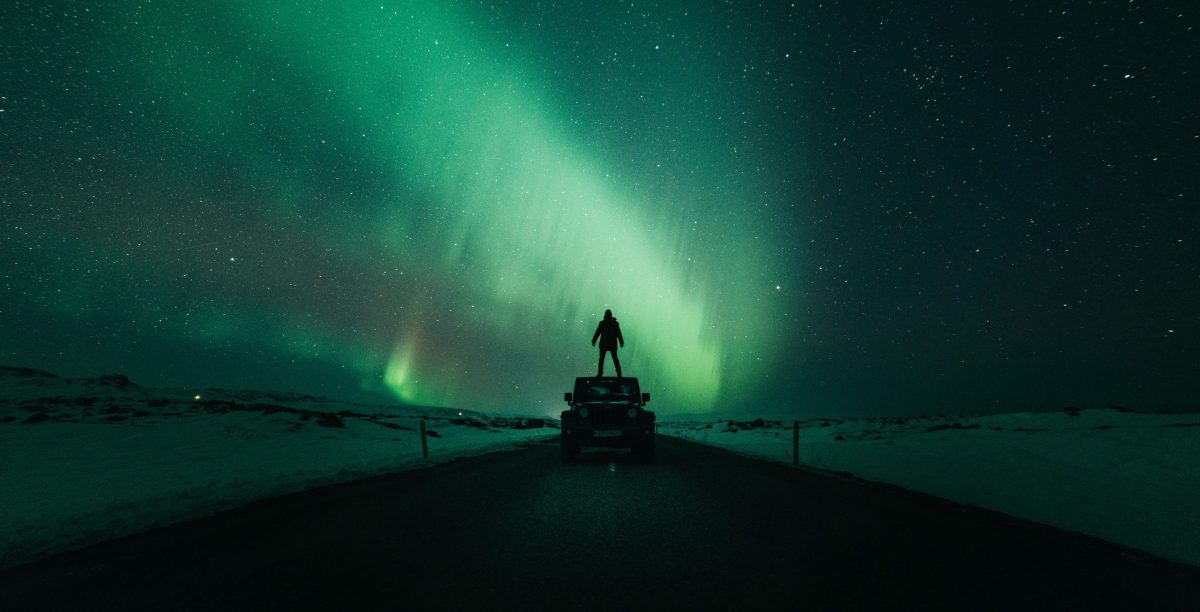
- Foreground too dark: include a lit foreground such as the vehicle or a person standing still.
- Stars blurring into trails: shorten the exposure.
Most of all, look up. A camera sees more than your eye in the dark, so a frame on screen may look more colourful than the sky did, and the other way round on a bright night. Put the camera down for a while.
Common mistakes to avoid
- Leaving autofocus on. The camera will hunt and then take a blurred frame.
- Using the built-in flash. It lights up the nearest few metres and does nothing for the sky.
- Waiting for perfect lights. Take test frames while the sky is quiet, so your settings are ready when the display starts.
- Forgetting the foreground. A frame with a mountain, a shoreline or the vehicle in it tells a story. The sky alone looks like any green glow.
- Over-editing. If you shoot RAW, keep your colour changes gentle. The real aurora is usually mostly green, with purple and pink at times.
Cold-weather care and a pre-tour routine
- Batteries. Cold drains batteries quickly. Keep spares in an inside pocket, close to your body.
- Gloves. Wear thin gloves under your mittens if you need fingers for buttons, and expect to take them off briefly.
- Condensation. When you go back into a warm place, a cold camera can fog up. Keep it in a closed bag and let it warm up gradually.
- Lens. Breath fogs lenses. Keep your face away from the glass.
Before you leave the hotel
- Charge every battery and pack the spares in a warm inside pocket.
- Clear your memory card so you do not run out of space halfway through the night.
- Practise switching to manual focus and setting the timer, in your room, with gloves on.
- Clean the lens and bring a soft cloth.
- Decide what you will do about the screen: lower the brightness so that checking a picture does not ruin your night vision.
Phone cameras
Many modern phones have a night mode that takes several seconds of exposure. Prop the phone on something solid, avoid touching it during the exposure, and tap to focus on a distant light or star. Phone batteries suffer in the cold too. For more phone ideas, our article on phone photos of the northern lights goes further, and photographing the lights on a tour covers the tour setting.
How our guides help
The FAQ says it plainly: guides are happy to assist with camera settings and positioning. On many tours they also take professional photos when conditions allow, shared with you after the tour at no extra cost. That means you can enjoy the lights first and photograph second, rather than spending the whole night behind a screen.
The guides choose the viewing spot from the latest forecasts, and the route can be inland, along the coast or even across the border into Finland or Sweden. They also pause to light a fire and share a warm drink, which is a good moment to practise your settings. A winter suit is included, with a warm meal, snacks and hot drinks.
For serious photographers. If photography is the main aim, the Private Northern Lights Tour is worth considering. The page describes flexibility and a pace set by your group, which is helpful when you want more time to set up a shot. It takes up to eight passengers, so friends who photograph together can share one vehicle. Compare the formats in small group versus private.
Frequently asked questions
Do I need an expensive camera to photograph the aurora?
No. A camera that allows manual settings gives the best control, but modern phones can also capture the lights on a still night. Guides can help with your equipment.
Will the guide take photos of me?
On many tours our guides take professional photos when conditions allow and share them with you after the tour at no extra cost.
Will the northern lights definitely appear for my camera?
No. The northern lights cannot be guaranteed by any operator. Book more than one night to improve your chances.
What about batteries in the cold?
The cold drains batteries quickly, so bring spares and keep them in an inside pocket.
Can I ask the guide about my camera before the tour?
Yes. Guides are happy to help with camera settings and positioning on the night. For equipment questions beforehand, contact the team.
Book the night, then pack the camera
Choose your date in the live calendar, plan more than one night if you can, and bring your charged camera. The rest is up to the sky and your guide.